
Welcome to your Start Here pottery classes!
This is the agenda for our time together.
Week 1: Pottery Wheel
Welcome to your Start Here classes at Mud Lily! Class will begin at 6:30. Before that, feel free to put your personal belongings in the cube storage under the stairs, use the bathroom, and find a seat in the classroom—your instructor can point you to all of these places!
Introductions
How SH works (click here to review this information)
Demo: Pottery wheel demo and session #1
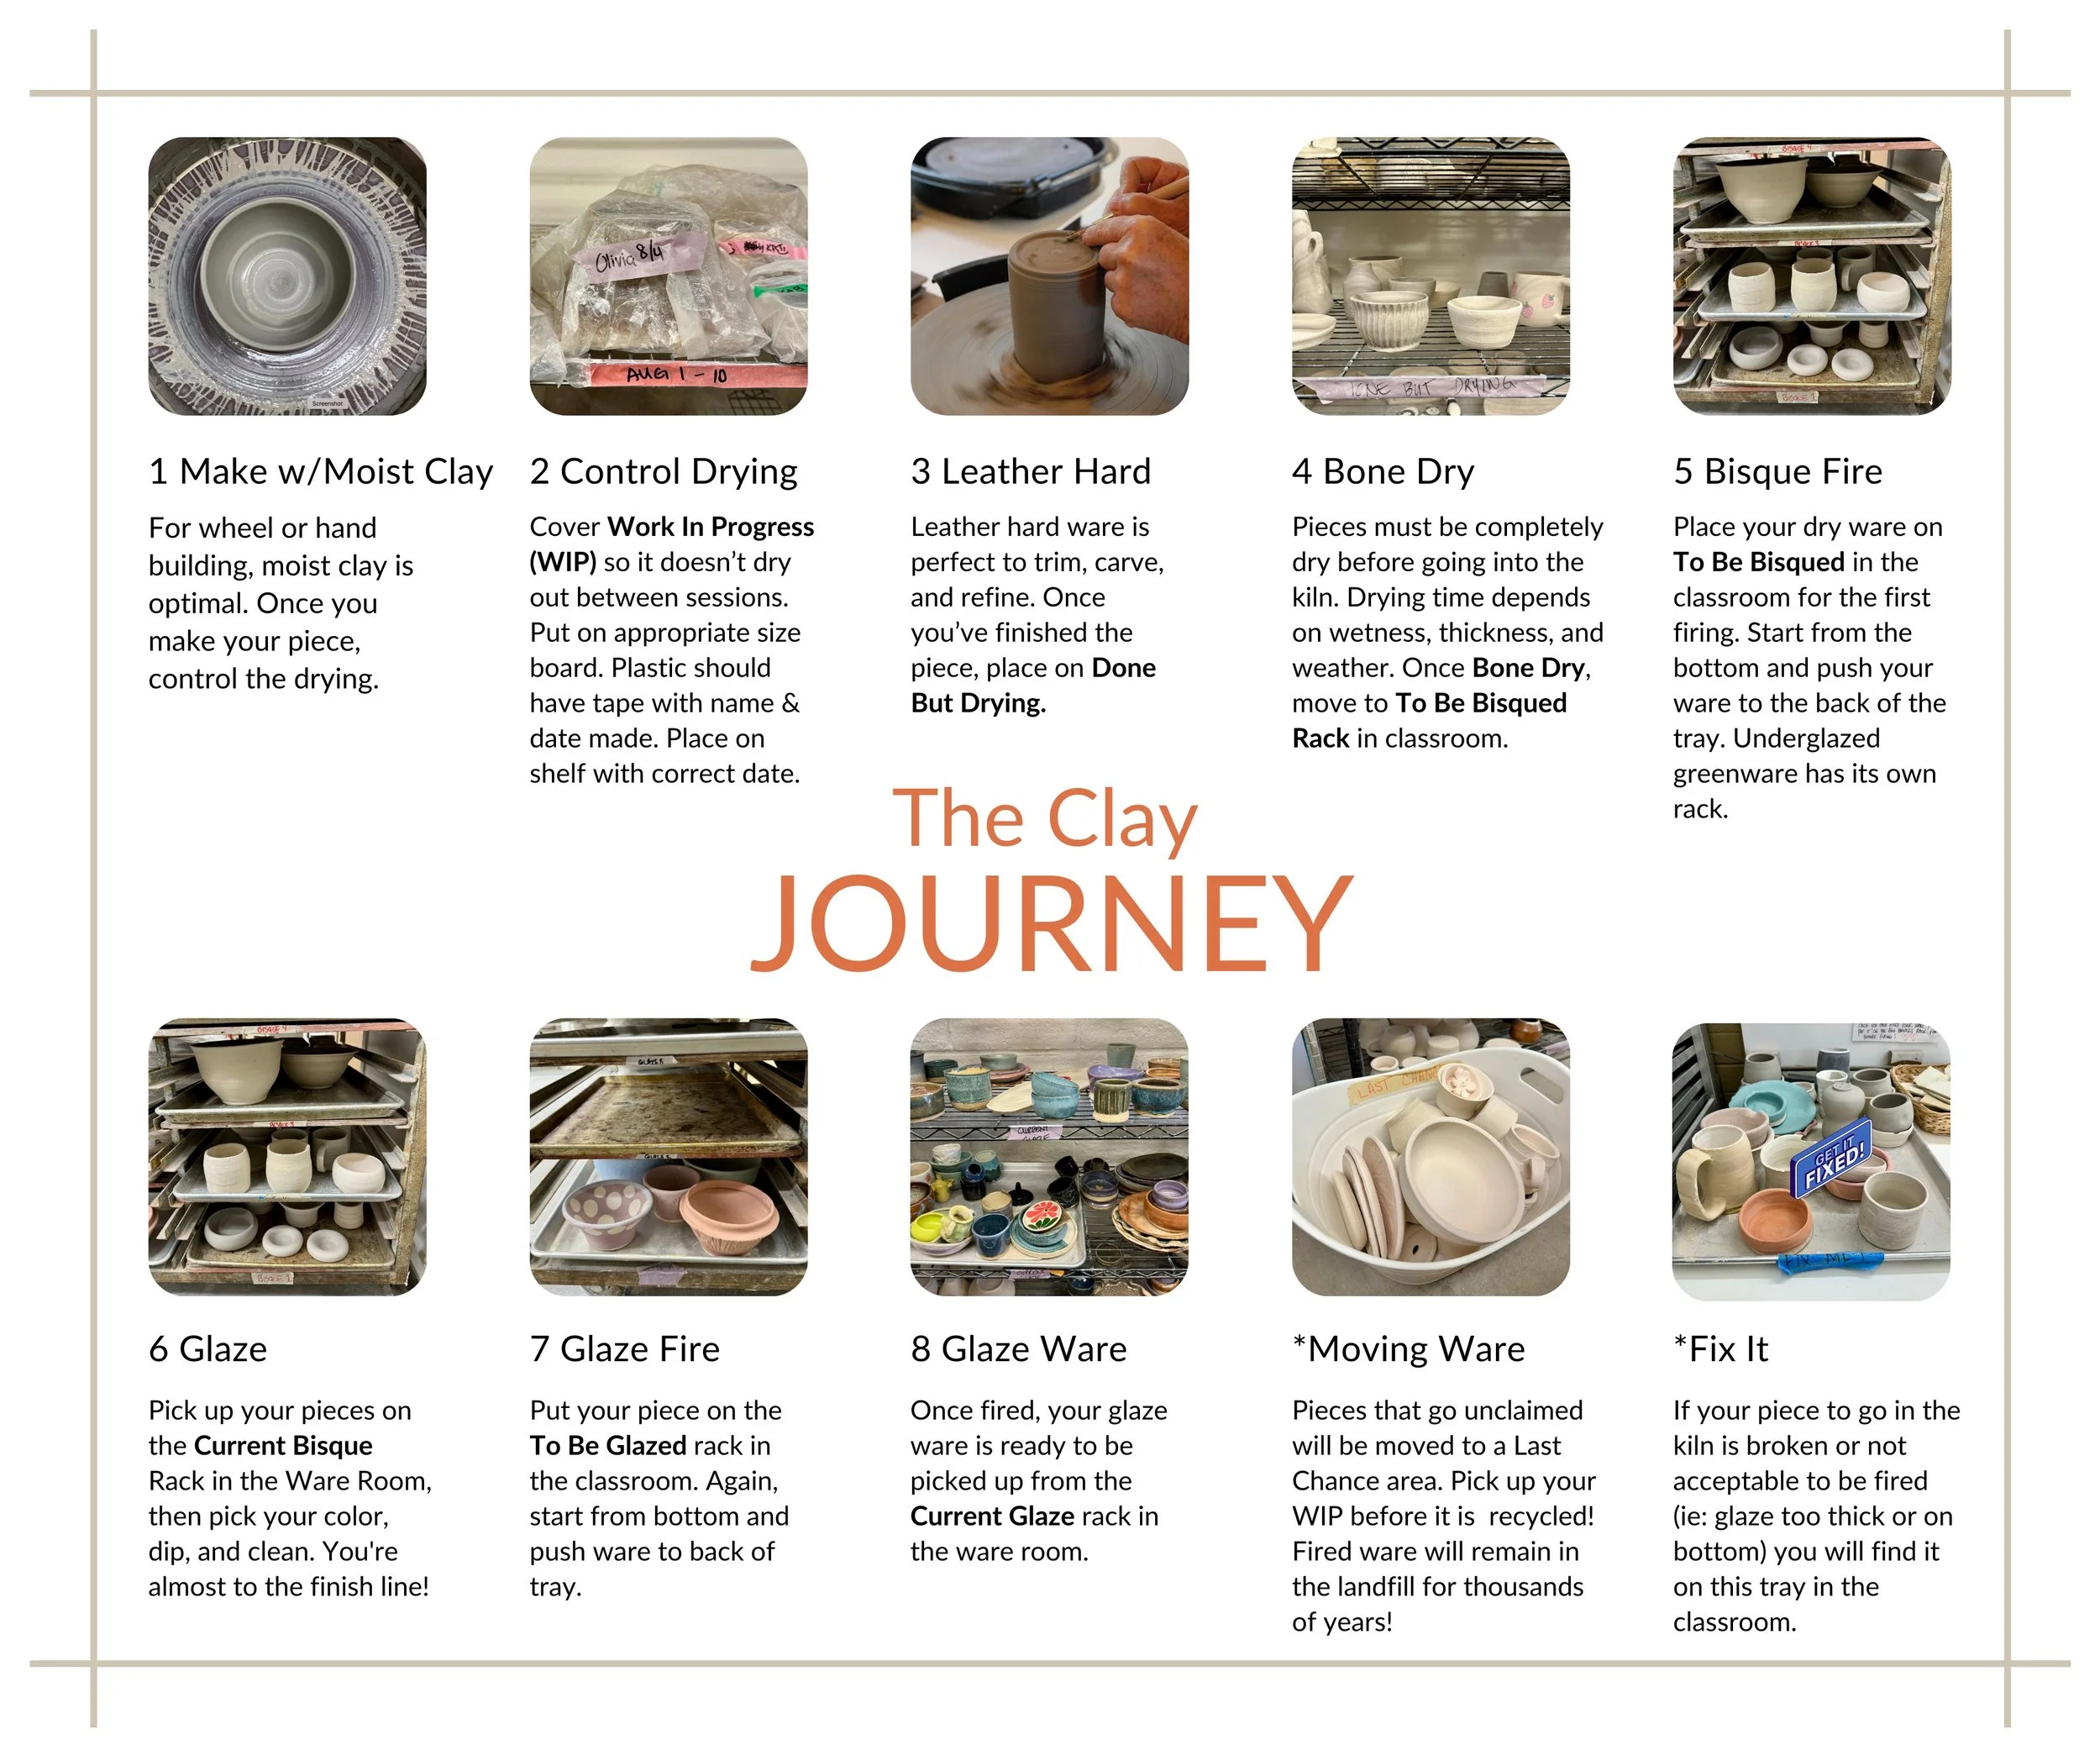
Discussion: Managing your work in progress (“WIP”) and how this fits into the clay journey
Demo: How to clean up after using the pottery wheel
You clean up your wheel following the demonstrated process. Make sure to keep clay out of the sink!
Check out with instructor before leaving. See you next week!
Read and understand “How Start Here Works” (click to enlarge)
Week 2: All about clay; improving your cylinders

Click to view all of the throwing/pottery wheel steps.
In the classroom you’ll find a quiz posted. Complete the quiz, pick up a bag of clay, grab the tools you’ll need for tonight from the mud room, then find your WIP from last week and take a seat!

Duck Beak Demo at 6 mins 45 sec mark.
Quick quiz review
We’ll use your pieces from last week to start our discussion on the stages of clay.
How to finish off the bottoms of pieces when you don’t plan to trim them
The Done But Drying rack
Wedging demo
Return to the pottery wheel. Please pick a different wheel than the one you used last week:
Practice centering
Improving your cylinders
How to re-use your clay using your new wedging skills
Pottery wheel clean-up time
Check out with instructor. Take your remaining clay home with you and don’t forget to bring it back next time!
Week 3: Trimming and attachments: Finishing touches and getting ready for bisque firing
In the classroom you’ll find a quiz posted. Complete the quiz, grab the trimming tools you’ll need for tonight from the mud room, then find your WIP from last week and take a seat!
Click to expand.
Quick quiz review
Moving ware that is ready to be bisque fired (from “Done but Drying” to “To be Bisqued”)—Find this in The Clay Journey!
Deeper dive on leather hard and what to do when your clay is wetter or drier than what you need
Demo: pulling handles, trimming wheel-thrown ware, adding attachments
Make a stamp blank and think about what kind of a stamp you’ll turn it into next week.
You do it!
Clean-up time
Check out with instructor before leaving.
Week 4: Hand building with clay; using the slab roller to make a plate
In the classroom you’ll find a quiz posted. Complete the quiz, grab the hand building tools you’ll need for tonight from the mud room, (no wheel throwing tools are needed). Move your WIP to the next step of the process. If you have questions about this, bring your work into the classroom and we’ll discuss as a group when we get started.

Click to enlarge and learn more ways to roll slabs
Quick quiz review and answer questions about where ware gets moved to next
How to buy clay
How to cut/weigh clay
Discussion: What is hand building? When/why to choose slab construction
Demo: rolling slabs at the slab roller or rolling pin method
Demo: Making a plate from a slab of clay
You do it! While waiting to roll your slab, use last week’s stamp blank to make your own stamp!
Clean-up time with deeper dive/review on reclaiming scrap clay
Check out with instructor before leaving.
Week 5: Glazing and what’s next
In the classroom you’ll find a quiz posted. Complete the quiz and have a seat in the classroom!
Quick quiz review
Discussion: What’s next after week 5? Purchasing 5 packs, and info on studio membership. Tonight-only, get 6 sessions for the price of 5
As a group: find your bisque fired pieces.
Discussion: Glazing considerations and prepping your pieces
Discussion: Dipping vs brushing, purchasing your own commercial glazes
You do it!
Reconvene as a group to look at and discuss glazed ware. What happens when there are glaze applications issues?
Firing schedule
Clean up and check out with instructor

Click for video demos of dipping glaze!
Staff-Recommended Resources: Jessica


